The skirt is done, bar the lining, and the jacket is ready for fitting: I’ve sewn up the back panels using the alterations to the pattern as used previously. No fuss. The front panels, where all the fitting takes place, are currently just a calico layer [which should become the underlining. The weird stretchy wet look stuff actually looks rather stoosh. I’ll wrestle with that lot once corseted anyway. So, the skirt.
Compared to some of the other, extremely technical and complicated versions, I decided that what makes the skirt so cool, are the following:
- Handkerchief hem
- Asymmetrical yoke
- The deep organza facings
So that’s what I did, and bugger all that pleating and complicated stuff. Life’s too short! I also want to wear this to death, so anything to ball-gownish would be wasted.
Step 1: I got out my StyleArc Ursula skirt pattern, and transferred the style lines that I’d eye-balled when I got the missus to try one of the skirts on. A bit of measuring showed that I’d produced a seam line that divides nicely into a 2:1 ratio at the point. Cool!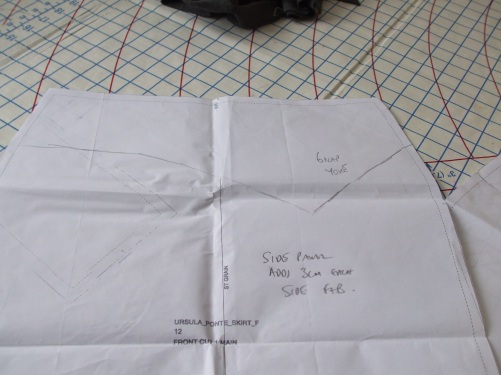
Step 2: I cut out the yoke pieces, and the single waistband piece from an uber-soft grey jersey scrap, and whizzed them up on the overlocker.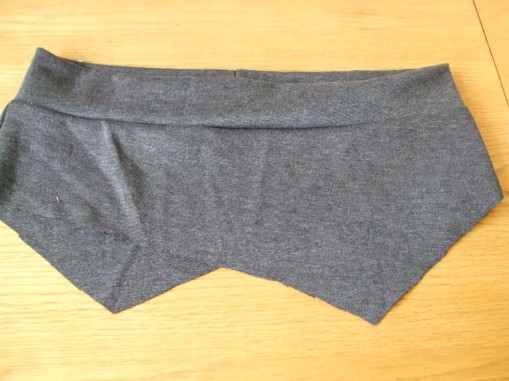
No elastic in the waist, this is going to be very comfy, and it won’t be crucial to check my waist cinching measurement if/when I wear it over a corset!
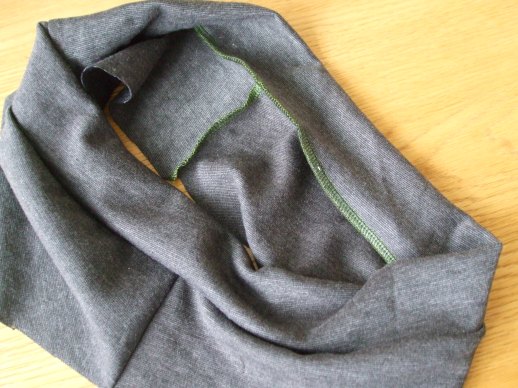
Step 3: much hilarity ensued when I got the missus to put on the yoke and stand still [ish] while I pinned on a dirty great piece of net curtain. Particularly hilarious as she was in a state of…well let’s say advanced undress. Ahem. My incredibly technical prep of the net curtain was to fold it in half, hack out a sort of waistline curve of roughly the right measurement, and then cobble it onto the yoke by eye. Very technical! I’d hope to go for pretty much zero waste cutting, but decided it needed a little more shape than just the rectangle. Not much though! Here’s what I ended up with after I trimmed it down a bit.
Here, the back is a tad longer than the front, but meh, I have no bum, I evened it all out to a single pattern piece, cut on the fold. It’s seamed together along those slightly curved edges top left and right, leaving four right angle points for the hem.
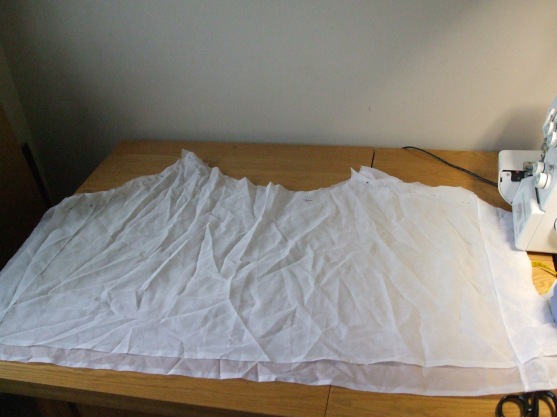
Step 4: And then I cut it out in silk. This is the chiffon/georgette lining. It turned out to be almost exactly the right amount of fabric, which made me happy!I had enough check silk to cut two complete layers [four pieces] which used the entire width of the fabric. The top layer is about 2″ shorter than the rest.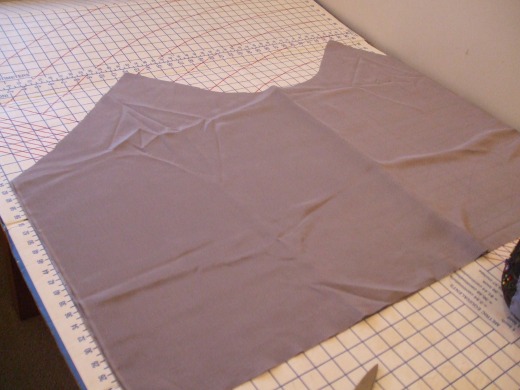
Step 5: I seamed all of these together with French seams, and hung the slippery lining up to stretch out a little before hand hemming it [that’s what I haven’t done yet, I’m not a miracle worker!]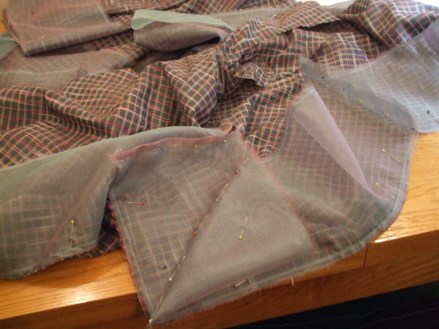
Step 6: I’d done some calculating, and tore all the silk organza [a beautiful, iridescent blue/lilac colour, really lovely] into strips which are about 19cm wide. I then pinned them onto the silk check, right sides together, joining and mitering as I went along. LOTS of pins. This stuff frays like a bitch! The whole sewing area is knee deep in spider-web threads of the stuff. I neatened up the pinning on the mitres, drew pencil lines, stitched, and pinked to trim, to minimise more fraying. Lots of pressing, then I stitched it all down, pressed some more, turned it through to the wrong side, and pressed a small turning under. I thought about hand sewing, but meh, not feeling in couture mode, I machined it, and it’s practically invisible anyway. Look at these gorgeous mitred corners!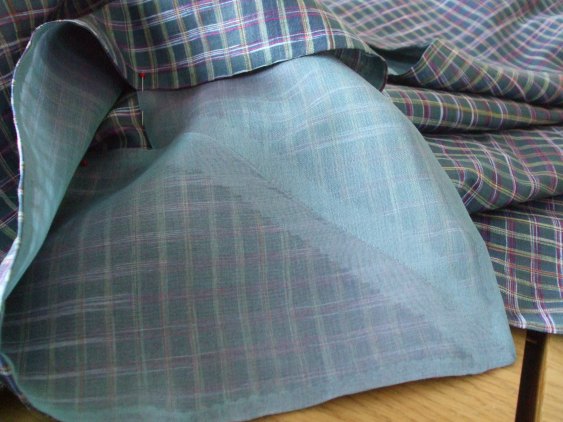
Step 7: A bit of a faff again here. I had to just go for it, and pin the completed tartan layers onto the yoke to see how they would look best, in respect of where the points are to lie. The missus was otherwise engaged, so it was trousers off, skirt on, skirt off, trousers on, repin…repeat until skirt arrangement was right. I began with the layers offset by a half turn, but it looked too symmetrical, so I re-jigged. I straight-stitched, then overlocked to neaten. Done!


All I want to do now is hand hem to chiffon stuff, then I’ll stitch it in over the existing stitching to enclose it all.
And that’s that!
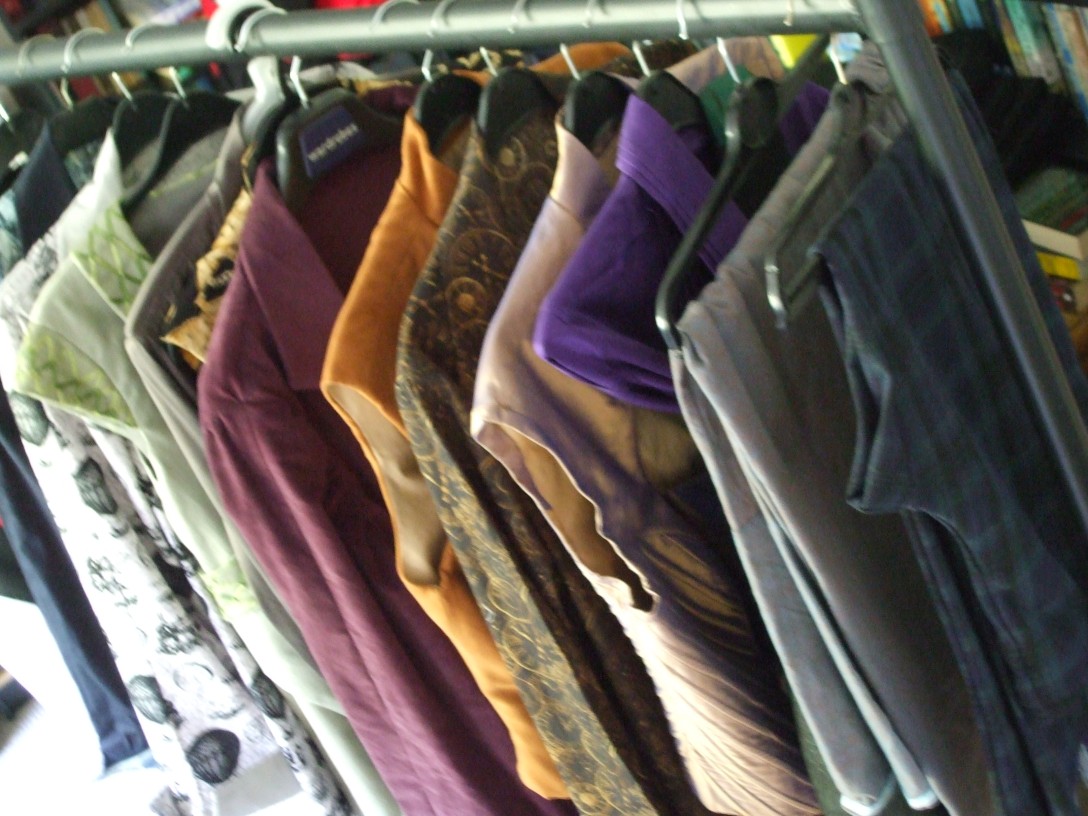
The missus is being rather recalcitrant about her photoshoot, so here’s a pic of her rail of clothes, assembled ready for it. Nice colours, huh?

Told you – whirlwind! Or perhaps hurricane…..
You are using such luxurious fabrics.
LikeLiked by 1 person
They are lovely, but I went for fast and dirty, can’t be doing with all this clever technical drafting, I’m too lazy!
LikeLike
Beautifully mitred corners (any tips/recommended tutorials? Mitring drives me nuts and takes ages).
I like how you’ve reduced the skirt to its 3 most desirable elements (asymmetric attachments, handkerchief hem and deep facing). A talent for seeing the wood for the trees. Good luck with the rest!
LikeLiked by 1 person
Thanks! I knew there was never any likelihood of me breaking that skirt down for a true copy. I’ll do a little photoshoot of the mitring process if that would be helpful- again, it’s my down and dirty method, but it works.
LikeLiked by 1 person
That was so fast. I really love the way that this is turning out, and your mitres look incredibly neat. What a huge amount of stuff for the missus’s photoshoot. You are a very prolific seamstress. Xx
LikeLiked by 1 person
Keeps me as sane as is possible…I get really twitchy and miserable when I’m not making things…
LikeLike
Beautiful fabrics and those corners are perfect!
LikeLiked by 1 person
Ta! Trying madly to get the bodice finished now…
LikeLiked by 1 person